It’s Bottling Time!
In my last post we went over some of the things I’d learned up to the fermentation process. The learning doesn’t stop there. Though it sounds a simple enough task, bottling my beer became a whole new challenge.
Most home brewed beer is bottle conditioned and aged. In this process sugar is added to the fermented wort and then sealed in bottles. The yeast in the beer goes to town on the new supply of sugar and creates the bubbles (CO2) and clarifies the beer over the course of weeks or months.
The excessive bubbles are the only way you can tell this is beer and not pee.
1. Sanitize Tools
I mentioned previously that my “dual purpose” fermenting/bottling bucket was in fact, not dual purpose. So, I will be siphoning the beer out of this bucket and into a new bottling bucket I ordered.
Here are the tools I’ll be using:
Racking cane
Siphon / Racking hose
Bottling Bucket (with spigot)
Bottle capper
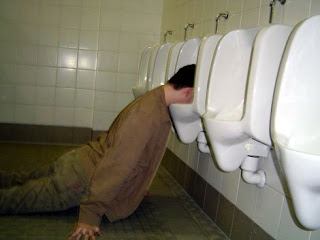
Had I done this right, I’d be using my “Theif” to extract a bit of the beer and my hydrometer to calculate the alcohol content. But, as previously mentioned, I neglected to take a hydrometer reading before pitching the yeast, so a more manual method will be used…. Drink until I fall down. Then try to remember how many beers it took. I can compare these results with those of a beer with known alcohol content and calculate accordingly.
Based on my calculations, this beer is 5.4% but the urinal cake could be skewing things.
2. Sanitize Bottles & Caps
In my last post I gave you some shortcuts. One of those was using the dishwasher on high temp wash and sanitizing rince to easily sanitize your bottles. Caps can be boiled or soaked in a cheap vodka or no-rinse sanitizer solution (or, if you’re me, you can forget to sanitize them altogether and hope your beer isn’t spoiled).
Edit – While I’ve found this method to be great for initial sanitizing after de-labeling and de-molding recycled bottles, I will be using StarSan no-rinse sanitizer and a vinator bottle washer. It really isn’t much more effort and it’s the right way to sanitize your beer bottles.
This method is at least as simple and proven fail-proof.
We’ll get to my excuse for forgetting to sanitize the caps in a minute. For now, just know that you should.
Dishes are done!
3. Prepare Priming Sugar
In most cases this is done by boiling a couple cups of water and dissolving corn (aka brewer’s) sugar in it (usually between 3-5 ounces for 5 gallons, but follow your recipe). It was suggested to me that this solution be dumped into the bottom of the bottling bucket and the siphon hose be sort of curved or half coiled to create a whirlpool effect. This “whirlpool” will allow the sugar to be evenly mixed with the beer as it siphons in.
Yeah. That’s dissolved sugar. Not every picture can be of a guy in urinal.
4. Siphon
Now we use our racking cane to siphon beer out of the fermenting bucket and into the bottling bucket. The bottom of the cane has a little foot which is intended to hold the siphon above the nasty puddle of sludge at the bottom of your fermenting bucket. Once I got the siphon started, this was no problem. There was a fair amount of swearing involved in starting the siphon in a sanitary manner, however. I’ve since ordered an Auto Siphon. This should result in a drastic reduction of obscenities.
Splashing is bad as it introduces oxygen and potential contaminants into the beer, so your partially coiled siphon hose in the bottom of the bucket is ideal for this reason as well.
Stop looking at the box of wine… I never claimed to have class!
5. Bottle & Cap
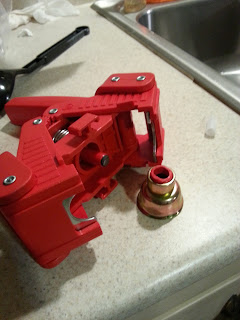
I’ve never used a bottle capper before, so I figured I’d test this red contraption out. At a glance it seems simple enough. Place the cap on the magnet in the capper, place the capper on the bottle, squeeze. Yeah… that’s how it’s supposed to work. I spent 15 minutes without a single success before turning to internet videos for help. They, of course, showed exactly what I was doing.
I’m pretty sure I invented some new swear words here. Now I’ve got 5 gallons of beer that won’t make it into bottles because I don’t possess the necessary coordination to cap… wait, what’s this brass thing?
Hmm… it has a jagged piece of red plastic on it. That’s the same color red as the cap… Damn it! It’s broken! (The company who sold us this kit will be receiving a not-so-nice email).
How many 4-letter words do you know? I bet I have you beat.
I now know that the piece that was broken off is called the “bell housing”. When super glue failed to have the necessary bond I opted to try just positioning the housing and cap over the bottle and guiding the capper down onto the bottle. By the grace of all that is holy, it worked!
I don’t think there are any videos on the internet for this.
Yes – the above is why I forgot to sanitize the caps. After all this, I pray that the beer gods will smile upon me and not harm my beer! We’ll find out in a few weeks.
Edit – They did!
Anyway – At this point I’m exhausted and the lady friend is ready to have me committed. Fortunately it was smooth sailing from here. She bottled the beer (leaving no more than an inch and a half of air in the neck) and I capped. We ended up with about 2 cases.
My drinking problem means she can’t afford pants without holes.
The beer was transported to a closet in the basement for a week and then moved to a mini fridge to continue to age for another 2-3 weeks. I should have (drinkable?) beer just in time for the Super Bowl.
Edit – Your beer should be left for a MINIMUM of 2.5 weeks at room temp to properly carbonate and condition.
It may not look like much, but this nearly killed me!
Up Next:
In my next adventure I begin my first 2-stage fermentation and create my own custom recipe for an Irish Mocha Stout!!
Please bookmark and share this blog with your friends!
Next Article: “My First Taste of Homebrewed Beer!“
—————————————————————————————————


No Responses to “Bottling Time”